The Testmoz results page makes it easy to see all your quiz result data at once. It also has powerful features to help you find, organize, adjust, and export your data. This page explains how to use the more powerful features.
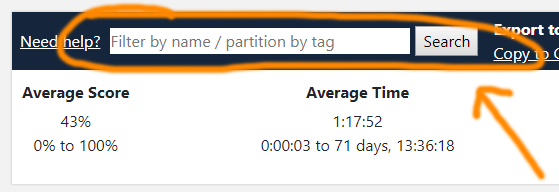
The search box is located at the top of the results page, and can be used to filter the results by a student's name (or whatever identifier you use). The search box also allows you to partition the results by one or more tags, and show archived results.
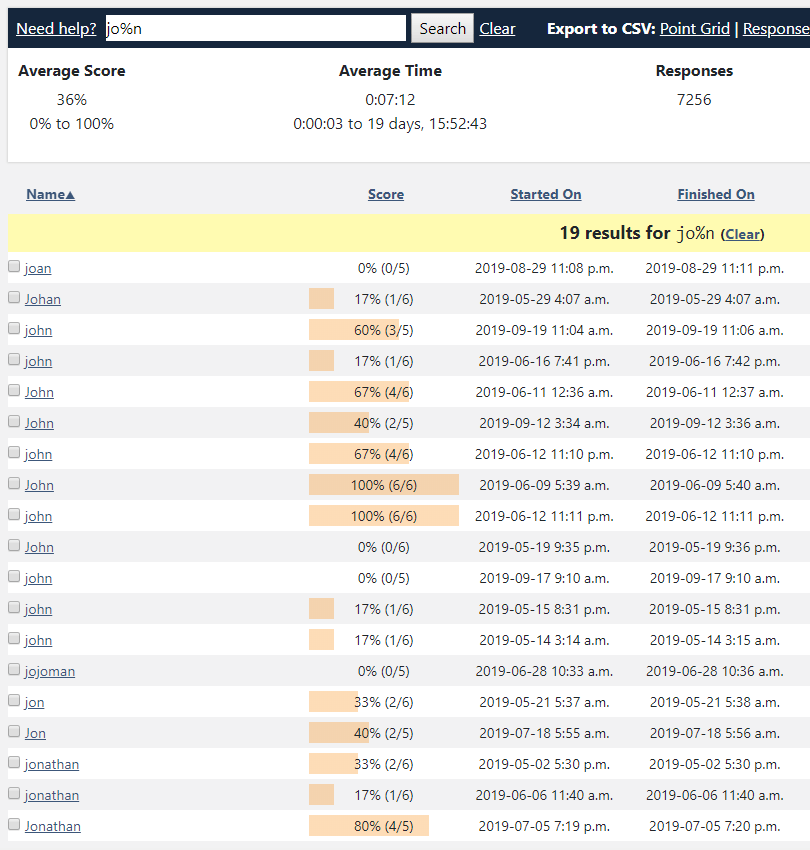
To search by name (or other identifier), enter the text that you want to match into the search box, and hit the Enter key on your keyboard. Wildcards can be specified with the % character.

If your results have been tagged, you can partition the results by a tag or a boolean combination of tags (using AND, OR, and NOT operators). This causes the stats bar and results table to update so they only show the results matching the tag criteria.
The search syntax to partition by tags is:
tags:tagname
where tagname is a tag name, or a boolean combination of tags (like tags:period3 OR period4)

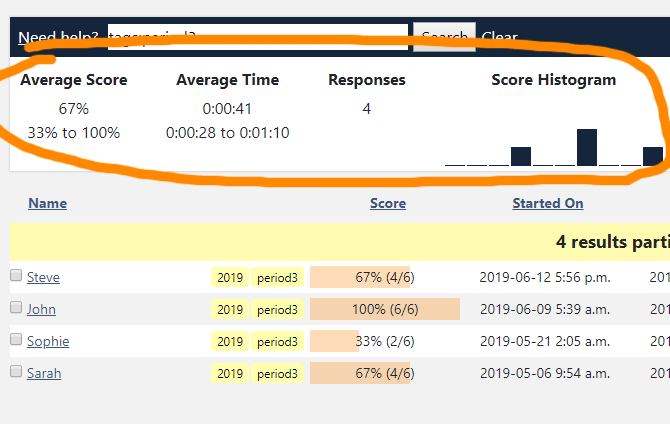
Notice in the above screenshot, the stats bar is showing the stats calculated only from the 4 results that match the tag. This makes it easy for you to compare stats across different tags.
If your results have multiple tags, and you want to partition by a boolean combination of the tags, you can use the boolean operators AND, OR and NOT. For example, if you enter tags:period3 OR period4, any result that is tagged with period3 or period4 will appear in the results.
You can also search the partitioned results by name. Simply append the name search after the list of tags:
tags:period3 OR period4 john
(Testmoz knows that "john" is not a tag because there is no boolean operator between "period4" and "john")
If your students take your test multiple times, and you want to "compress" or group multiple results per student into a single row, you can.
For each student, you can show their min, max, first or last score.
Consider a set of results like this:
If you want to show the max score per student, you can type:
score:max
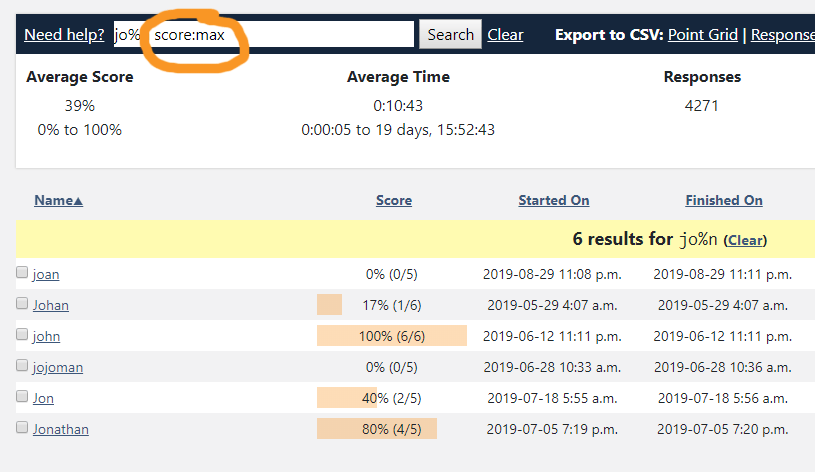
You can do:
score:max to show the maximum score per student
score:min to show the minimum score per student
score:first to show the first score per student
score:last to show the latest score per student
You can combine the score: operator with name searches, and tag partitioning queries.
The stats bar displays summary statistics about your test results. The average/min/max score, average/min/max time taken, a count of the results, and a histogram of the scores are visible at a glance.
The results table shows a row for each person who took your test containing their name, score, the date/time they started the test, the date/time they finished, and how long it took them to complete it.
It also shows a line of icons for each question in the test. These icons indicate:


You can put your mouse over the icon to see what the student's response was. The percentage % shown below the question number indicates the percentage of students who answered that question correctly (or partially correctly). You can put your mouse over the question number to see the question text.
You can click a column header like (Name, Score, etc) to sort by that column. The triangle next to the column name indicates the sort order (ascending or descending). Click the column name again to toggle ascending or descending sort.
You can select one or more results by clicking the checkbox next to the student's name. Hold the shift key, and select another row to select the entire range.
The small > symbol before the name (which you can see in the screenshot above) simply indicates which row you last clicked in to. This can help you keep track of which results you've looked at.
From the results table, click a student's name to bring up their detailed results page.

This shows you a complete rendering of the student's test, including which answer the student selected, and how many points they earned. If you want to manually adjust the points, you can click the white text field in the top right corner of each question. When you're done reviewing, or updating the scores, click "Update Scores" at the bottom of the page (or click "Go Back" if you don't want any changes applied).
From the results table, click a student's name to bring up their detailed results page. From your browser's menu, choose "Print" (or use CTRL p on your keyboard). The ability to print multiple tests at a time is coming soon (along with the ability to customize what is shown on the printout).
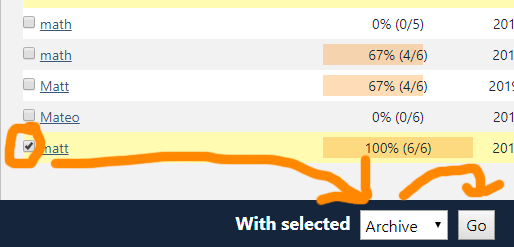
You can archive test results. Archived results are hidden from view by default, and do not count towards the student's test attempt limit (if there is a limit). It's almost like a "soft delete".
From the results page, check the checkbox next to the student's name. From the menu at the bottom of the page, choose "Archive" and click "Go"
On the results page, in the search box, enter
tags:archived
Archived records are just a special tag. You can combine it with other tags. For example, to find all archived records from the tag "period3", you can enter tags:archived AND period3
To see all results (archived or not), enter tags:archived OR NOT archived
To leave feedback on a student's result, click their name from the Results page. Then on the right side of the page, click the comment icon. Enter your feedback, and click "Save" at the bottom of the page.
To delete feedback, empty the contents of the text box and click somewhere else on the page. Then click "Save" at the bottom of the page.
Any feedback you leave on the student's result will be visible if you email their results (described below).
To email test results to someone, check the checkbox next to the results you want to email. Then choose "Email" from the bottom menu.
On the next page, you should enter an email address to send each result to. You can send a result to multiple people by separating the email addresses by a comma.
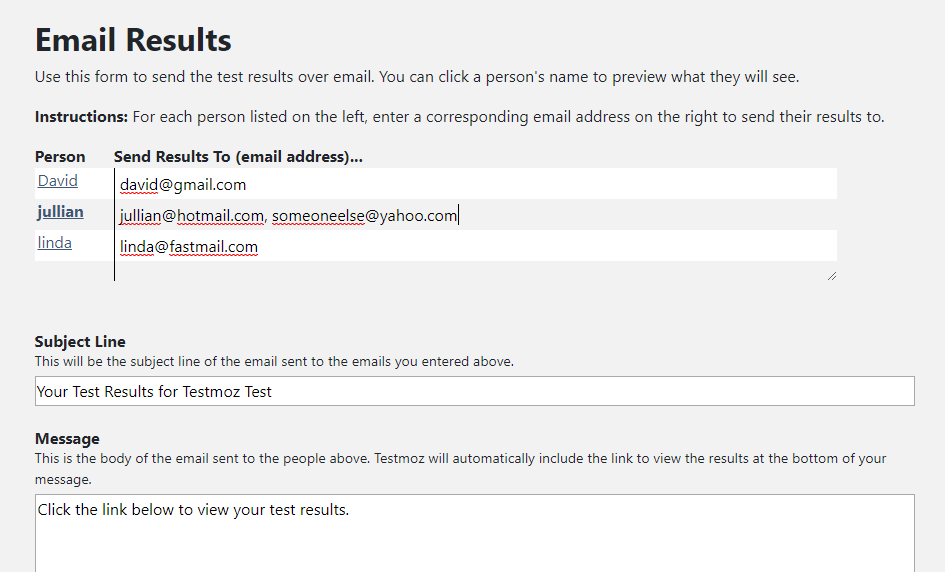
When you submit the form, a link to the respective test results will be sent to each email address you listed. Once an email has been sent, you cannot disable their access to the result (except by archiving the test result).
To delete a result, check the box next to the student's name on the results page, choose Delete from the bottom menu, and click "Go". Results are permenently deleted after 30 days in the trash.
To restore it from the trash, type tags:trash in the search box (or click the trash link in the search box tooltip). Then check the result, and click "Restore".
Tags are just abitrary labels you can attach to results. For many users, there is no benefit to using tags. But if you have multiple groups of people taking the same test (multiple classes or periods for instance), or want to keep your results organized by year, tags give you lots of organizational power.
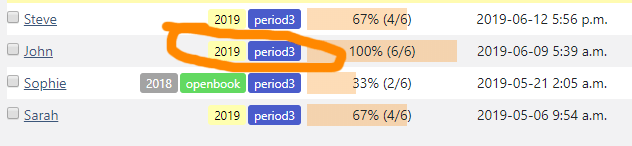
The results page displays the tags to the right of the student's name. If there are no tags attached to the result, you won't see anything.
To add or remove the tags on a result, check the checkbox next to the person's name. You can select a range of results by holding the shift key while you check the checkbox.
After you check one or more checkboxes, a menu will appear at the bottom of the screen. From the menu, click Add Tags. A textbox will appear on the result row. You can type a tag name, and then press Enter on your keyboard. You can also hit the spacebar or tab key to add another tag. To edit a tag, double-click it. To delete it, double-click it, and delete the tag name.
You can easily export results to CSV by clicking the links on the search bar:
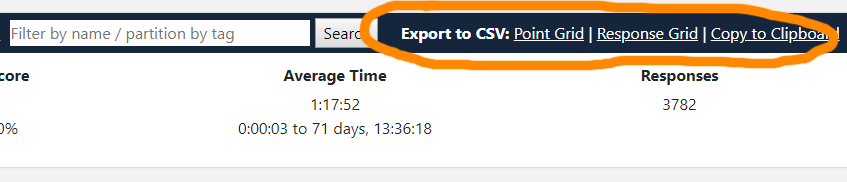
The CSV files contain a row for each result. The columns include the name, score, and more. There is a column for each question in the quiz. The Point Grid displays the points earned by the student for each question, whereas the Response Grid contains the actual response.
To make copying into Excel easy, there is a Copy to Clipboard option. Click that link to copy the Point Grid data to your clipboard. You can paste it into Excel without downloading the CSV file.
If you have partitioned the results with a tag search, the CSV files will only contains the results from the partition. Likewise, if you have grouped the results using the score:max (or min, last, first) operation, that will be reflected in the CSV export.
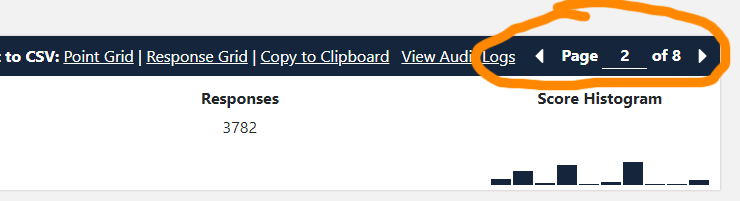
The audit logs contain a timeline of information about who took your quiz. You can access the logs by clicking the "View Audit Logs" link on the top search bar.

Testmoz shows 500 results per page. If more than 500 people have taken your test, you can use the arrows to navigate between pages. You can also type the page number and hit enter to navigate to any page.
You can manually add tags as described earlier. But it's far more useful to have your results automatically tagged.
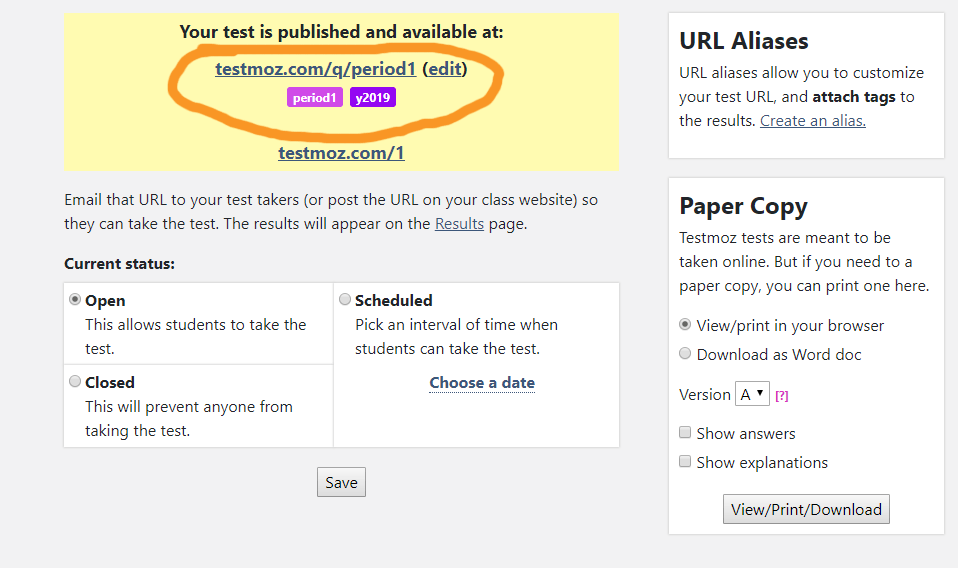
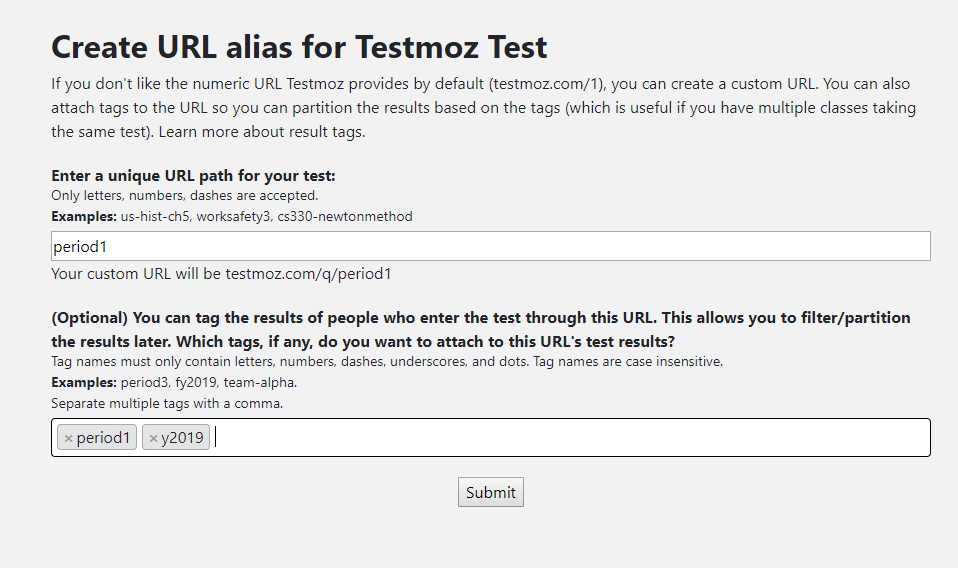
To apply tags automatically when someone takes your test, you should create a custom URL with tags. Go to the Publish page for your test and click "Create an Alias"
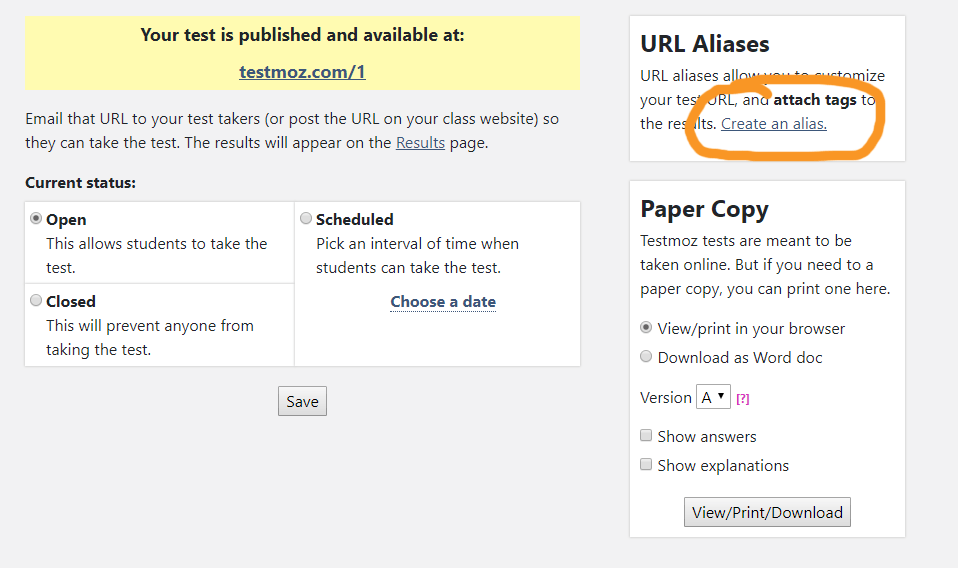
Enter the desired URL path for your test. It will be appended with testmoz.com/q/. Then enter the tags you want to automatically apply to any test taker who takes the test from this URL.
After you save, the new URL will be visible on the Publish page, along with its tags. Give that custom URL to your test takers to ensure their results are automatically tagged.