
After you have made your test, you can publish it from the Publish page in Testmoz.
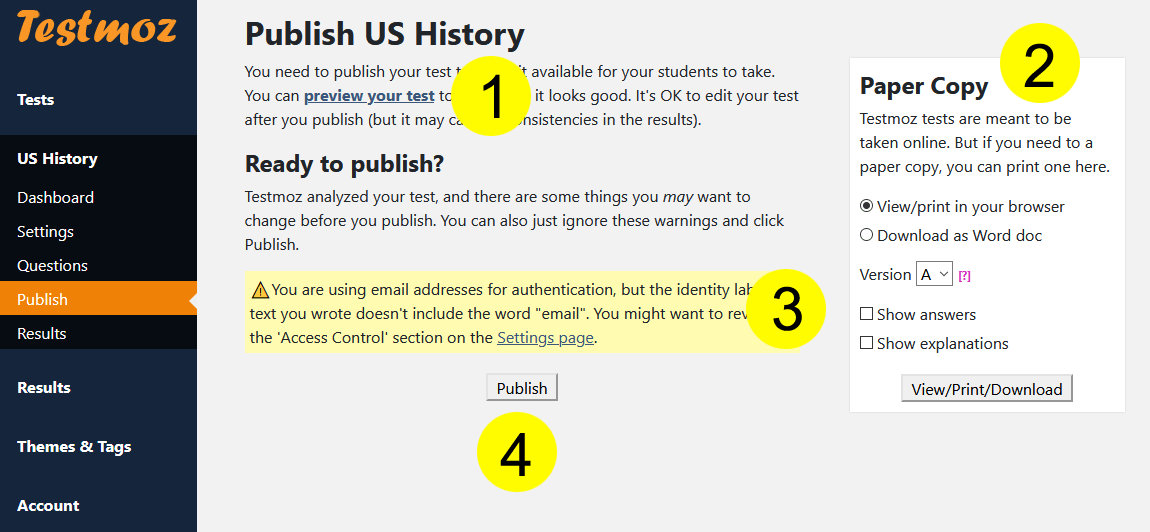
Before you publish your test, the Publish page will look like the above screenshot.
1. You can preview your test by clicking the "preview your test" link. Your results will not be recorded when you take the test.
2. You can print a copy of the test with and without the answers and explanations. Multiple versions can be printed (this is useful if you want to pass out different versions to people sitting next to each other).
3. In some cases, Testmoz will detect a potential problem with your test. You can review the warnings, and decide if you want to do anything about them.
4. When you're ready to publish, just click the Publish button.
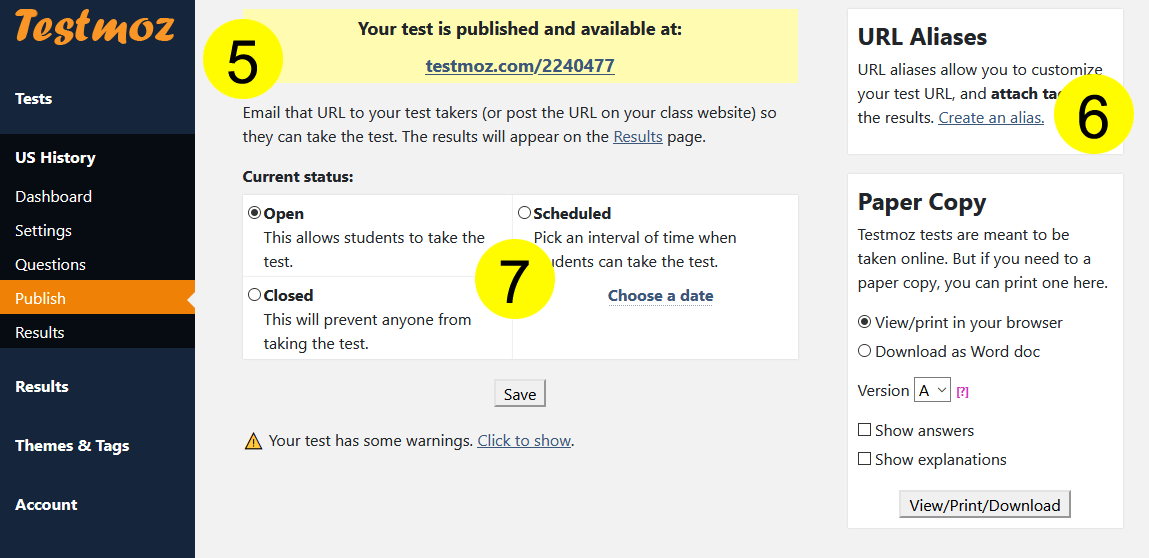
After you publish your test, new options are available to you.
5. Testmoz automatically generates a default URL for your test. You can give this to your students, post it on your class website, or email it. This is where students need to go to take your test.
6. If you want to create a custom URL for your test (instead of using the default numeric one), you can create an alias. Additionally, URL aliases give you the ability to tag your results. Tagging results is very useful if you have multiple classes taking the same test.
7. By default, your test is open and available for your students to take. If you want to prevent anyone from taking your test, you can close it. You can also schedule an interval of time where your test will be open, and it will close automatically.
When you create an alias, you create an alternative URL that students can access your test from. The default URL Testmoz generates is of the form testmoz.com/123 (where 123 is your unique test ID number). But an alias allows you to create a URL like testmoz.com/q/cs123-test4. This alone isn't all that useful, but when combined with tagging, it is.

Testmoz allows you to attach "tags" to the alias. A tag is just an arbitrary label. You might have a tag called "period3" and "period5". Any student who accesses the test through the URL alias will automatically have their test result tagged with the tags you specified. The utility of this feature best described with an example.
Pretend you're teaching a US History course to 3 different class periods (period 3, period 5, and period6). You want to distribute a US History test to every class.
The third option is the best.
Using the example above, imagine you were giving 20 quizzes throughout the course, and you wanted to use tagging to keep your results separated.
It would be very tedious to create multiple aliases for all 20 quizzes. Fortunately, there is a "secret" feature of Testmoz to eliminate the tedium.
With any test URL, you can append a hash sign (#) followed by the tag name.
For example, if you have tags in your account named period3, period5 and period6, and your test URL is testmoz.com/123, you can tell your students to take the test at the following URLs:
testmoz.com/123#period3
testmoz.com/123#period5
testmoz.com/123#period6
You don't have to manually setup an alias for each period!